The Easiest Anchoring Method for Beginners: Secure Your Reclaimed Packaging with Confidence
When it comes to turning reclaimed packaging into sturdy storage or charming display pieces, anchoring is often the step that intimidates the DIY newbie. Yet, with the right techniques and tools, even beginners can create anchors that look professional and hold firm—enough to manage weight comparable to a crate of well-packed paperbacks (roughly 10-15 pounds). This post breaks down the easiest anchoring method for beginners focusing on a loop-and-flatten 20-25 mm wire technique, reinforced with a washer 12-15 mm backing, and finished with safety in mind by covering ends with felt. Along the way, I’ll recommend essential tools like parallel-action pliers and side cutters that are worth their weight in gold for tidy bends and safe cuts.
Why Anchoring Matters for Reclaimed Packaging
Reclaimed packaging—think gift boxes, used totes, or sturdy cardboard from bulk shipments—is like the foundation bookshelves of your DIY library. They have character and potential but usually need some reinforcements to make them trustworthy. Just as a library wouldn’t stack all its books without support, your reuse projects need sound anchoring to prevent sagging or sudden drops, which are common when materials are weak or anchoring holes are ragged.
- Load Capacity: Wire gauge and anchoring style determine how much weight your anchor can safely hold. Flimsy floral wire? Think tissue paper in the world of wire—avoidable for load-bearing tasks.
- Material Integrity: Weak packaging materials often tear around holes. Before drilling, reinforcing these points can extend anchor life and avoid frustration.
- Tool Precision: Parallel-action pliers provide consistent, clean bends without kinks. Side cutters ensure safe, precise cuts without metal splinters—lazy cutting leads to ragged edges that start tears.
Understanding Wire Gauge and Load Capacity
Wire gauge isn't just a number; it’s the backbone of your anchor's strength. For loop-and-flatten anchors, using a wire gauge that balances flexibility and strength is key. Here’s a quick reference:
Wire Gauge (AWG) Diameter (mm) Approx. Load Capacity Best For 18 AWG 1.02 mm Up to ~5 kg (11 lbs) Light decorative anchoring, small totes 16 AWG 1.29 mm Up to ~10 kg (22 lbs) Medium loads, typical reclaimed packaging 14 AWG 1.63 mm Up to ~15 kg (33 lbs) Heavier boxes, garage shelvesFor most beginner projects involving reclaimed packaging, 16 AWG wire strikes a sweet spot between manageability and strength. Thicker gift bag bathroom caddy wire (like 14 AWG) can be tougher to bend cleanly without the right pliers and may stress flimsy packaging.
The Loop-and-Flatten 20-25 mm Method: Step-by-Step
This anchoring technique excels for beginners because it provides strong, consistent loops—think of them as handrails that keep your storage system upright and reliable.
- Measure and Cut: Cut a wire length that allows for a loop between 20-25 mm plus enough to flatten and secure. Faster with side cutters to prevent ragged ends.
- Form the Loop: Using parallel-action pliers, bend the wire into a smooth loop of 20-25 mm diameter, adding a tiny tolerance of plus or minus 1 mm. Avoid kinks by applying steady pressure rather than quick snaps.
- Flatten the Loop Base: Flatten the wire ends securely where they’ll anchor to the packaging surface, creating a wider contact area and reducing pressure points that cause tears.
- Reinforce with Washer: Place a 12-15 mm washer underneath the flattened wire ends on the inside or backside of the packaging, distributing load evenly.
- Drill Pilot Hole: Before pushing the wire through, drill a narrow pilot hole just big enough for the wire gauge plus up to 1 mm tolerance to avoid splits.
- Secure the Anchor: Tighten using small machine screws or bolts through the washer and wire base, ensuring snug fit but not overtightening to crush the material.
- Finish with Felt Covering: Cover all exposed wire ends and washers with small felt pads to avoid snagging clothes and add a neat appearance.
Tool Focus: Parallel-Action Pliers vs. Regular Pliers
Beginners often wonder if a regular slip-joint plier can suffice. My advice? Parallel-action pliers are worth the investment—they grip uniformly, giving clean bends that don’t kink the wire. They’re like hardcover bindings in the book world: making sure everything stays neat and durable.
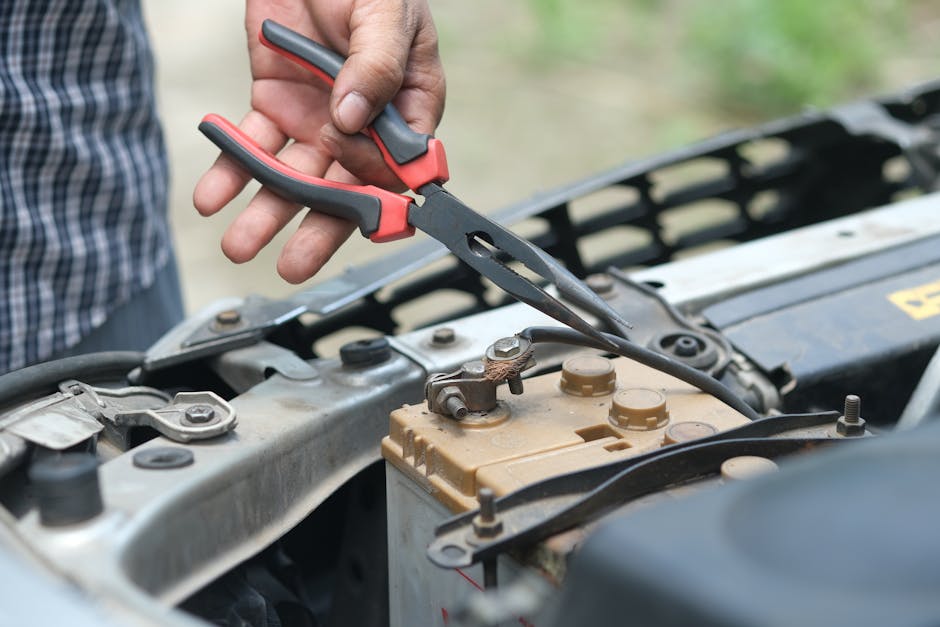
Side cutters are just as important, but beware of cheap ones that crush the wire. Quality side cutters slice cleanly, making the wire ends safe to handle and easy to cover with felt.
Reinforcement Before Drilling: Don’t Skip This Step
Reclaimed packaging often has thin walls that crack or tear around holes—something like a cracked book spine. You can reinforce by:
- Adding Cardboard Layers: Glue a small patch behind the drilling area for thickness.
- Using Packing Tape: Apply strong tape over the spot to prevent splintering and extend material lifespan.
- Drilling Slowly: Use a small drill bit first (pilot hole) to minimize stress before widening.
These little reinforcements make a big difference, turning a fragile anchoring point into a trustworthy node capable of bearing weights akin to a small stack of paperback books.
Summary Table: Key Steps & Tips for Beginners
Step Details Tools & Materials Tips Wire Selection Choose 16 AWG wire for balanced strength and flexibility 16 AWG wire spool Avoid floral wire—too weak for bearing weight Cutting Wire Use side cutters to get clean, safe ends Side cutters Sharp blades prevent ragged edges and splinters Bending Loops Create 20-25 mm loops using parallel-action pliers Parallel-action pliers Apply steady pressure to avoid kinks Reinforcement Patch material before drilling to prevent tearing Extra cardboard, packing tape, drill Drill pilot holes to reduce stress Anchoring Use washer (12-15 mm) under flattened wire ends Washers, small screws/bolts Snug but not overtightened Safety Finish Cover wire ends and washers with felt Felt pads, strong glue Prevents snagging and looks tidyConcluding Thoughts
In the world of DIY storage and reuse, https://daisydustmaid.com/what-comfort-radius-fits-average-hands-for-a-wire-handle/ anchoring may seem like the equivalent of the often-overlooked library foundation—but it’s precisely what keeps everything standing and safe. Starting with the loop-and-flatten 20-25 mm method reinforced with a 12-15 mm washer and using quality tools like parallel-action pliers and side cutters, beginners can achieve strong, neat, and trustworthy anchors that hold packs as reliably as a modest stack of paperbacks.
Remember to always reinforce weak materials before drilling and cover exposed metal for safety. These small steps will elevate your reclaimed packaging projects from charming yet ephemeral to robust and reusable storage solutions you’ll be proud to show off.
Happy anchoring, and may your storage library be well-supported and organized!